How to integrate Roadmap with Klaviyo (bypassing Klaviyo fees)
Walkthrough (Arcade)
Use the embedded walkthrough below, then follow the written steps for a fast copy/paste setup.
Before you start
- You need access to your Shopify admin and the Roadmap app.
- You need access to your Klaviyo account to create a Private API key.
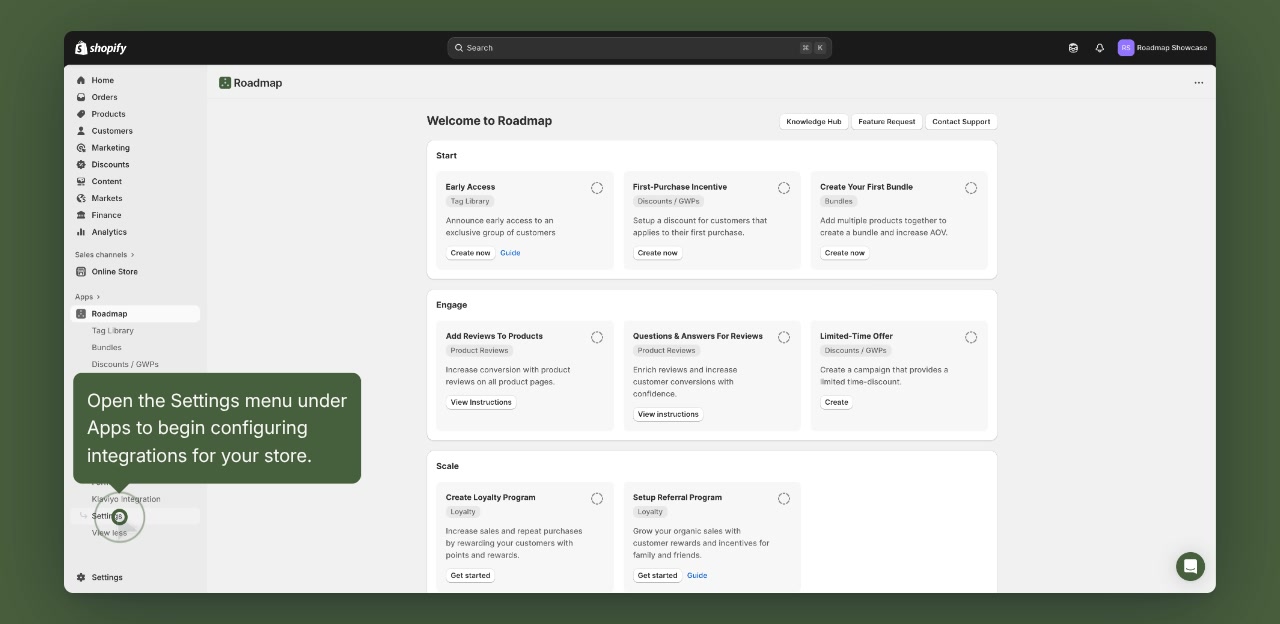
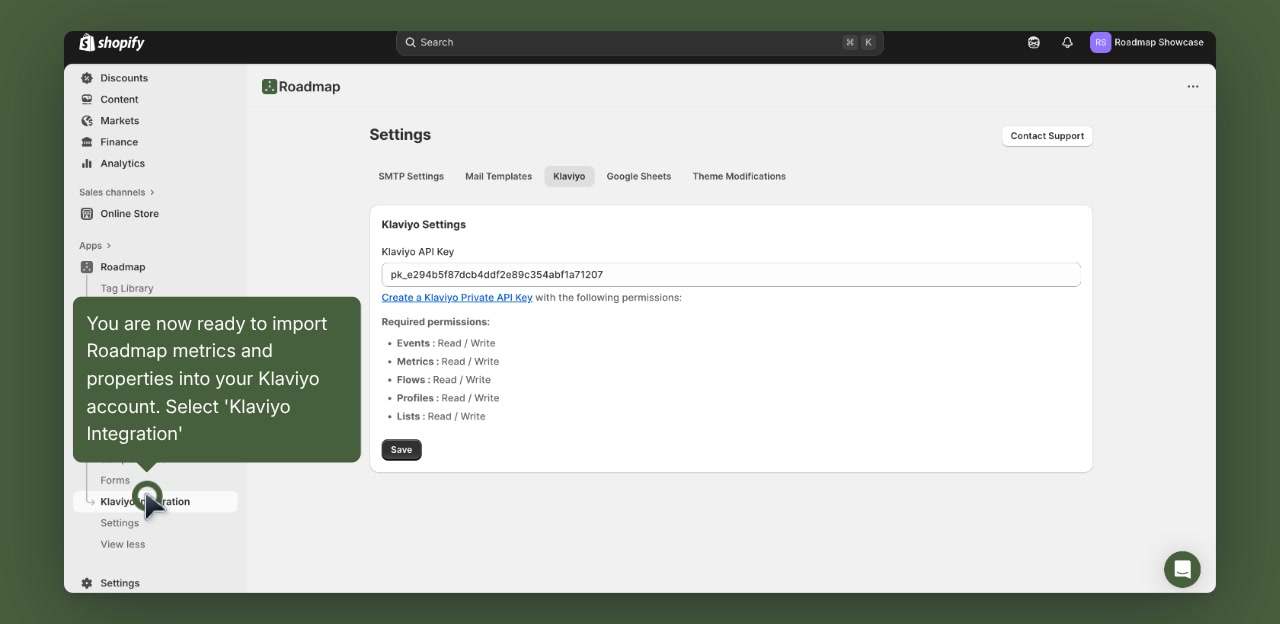
Step 1: Open Roadmap Settings in Shopify
In Shopify, open Apps and select Roadmap. In the Roadmap left menu, click Settings.
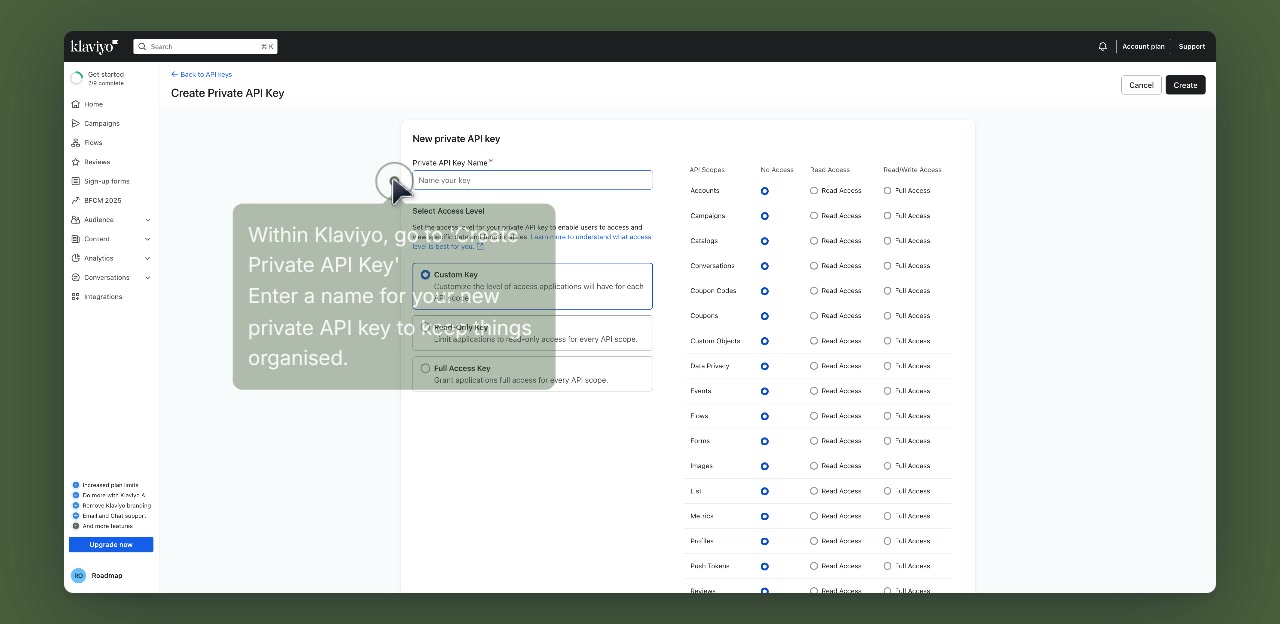
Step 2: Create a Klaviyo Private API key
In Klaviyo, go to the page titled Create Private API Key, then enter a name in Private API Key Name so you can recognize it later (for example, Roadmap).
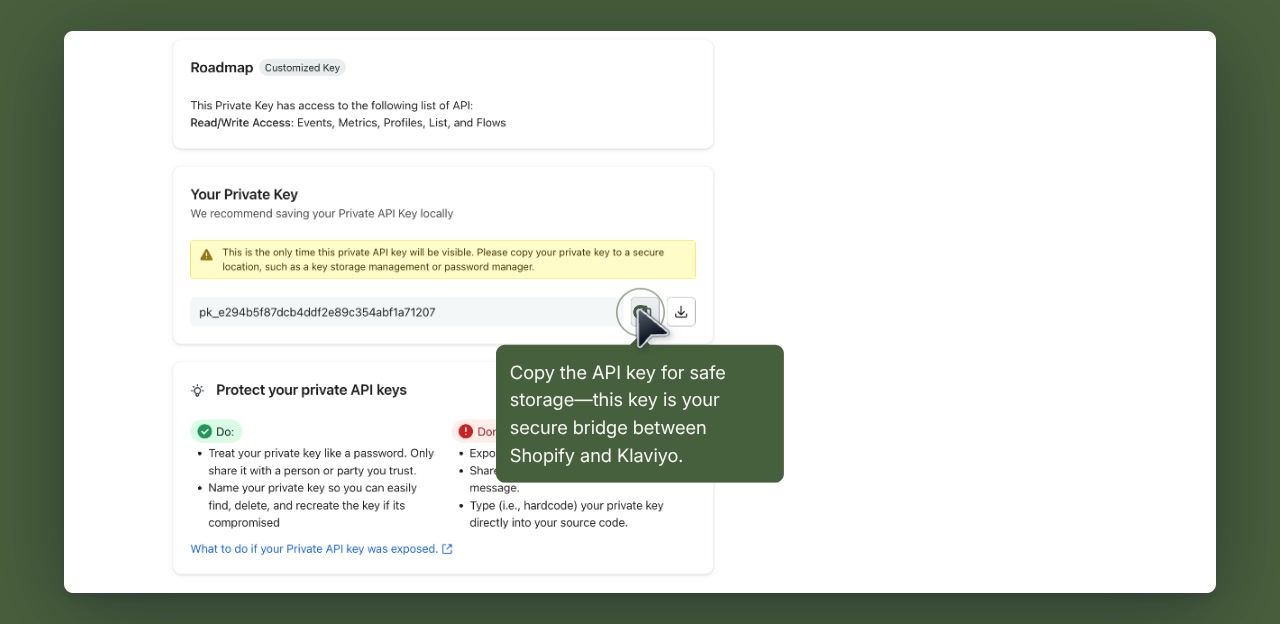
Click Create. When Klaviyo shows Your Private Key, click the copy icon and save the key somewhere secure.

Step 3: Paste the API key into Roadmap
Back in Shopify (Roadmap), go to Settings and select the Klaviyo tab.
Paste your key into Klaviyo API Key, then click Save.
Step 4: Sync Roadmap data to Klaviyo
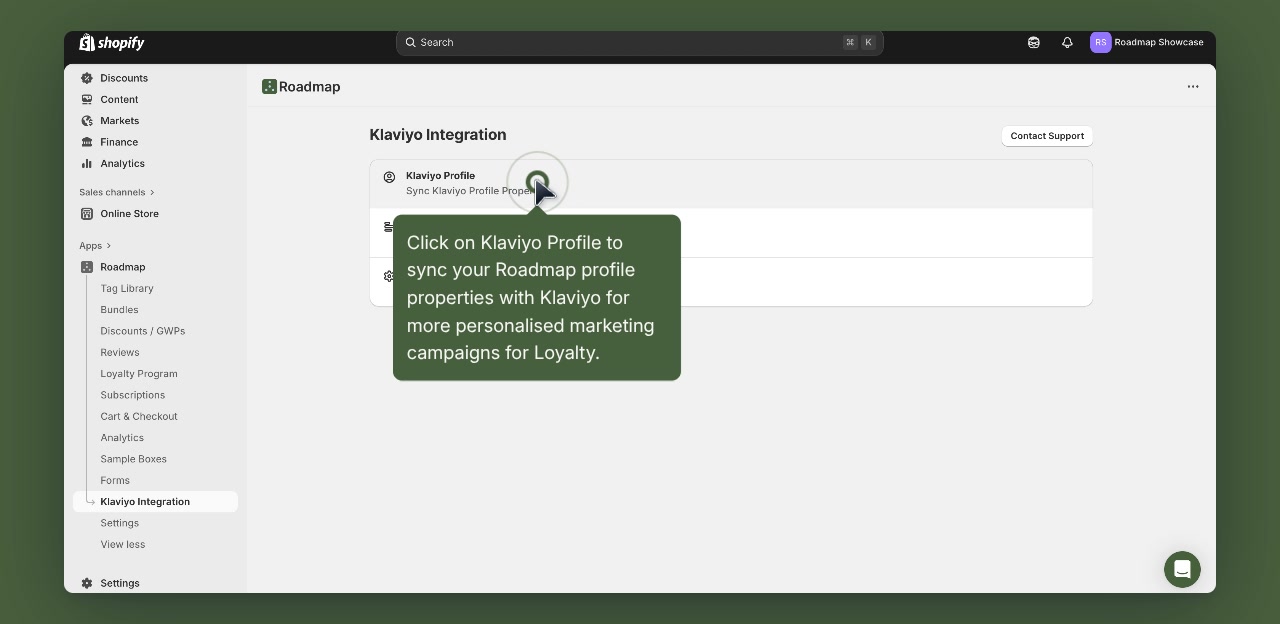
In the Roadmap left menu, click Klaviyo Integration.
On Klaviyo Integration, select Klaviyo Profile to sync Roadmap profile properties into Klaviyo profiles (useful for segmentation and personalization).
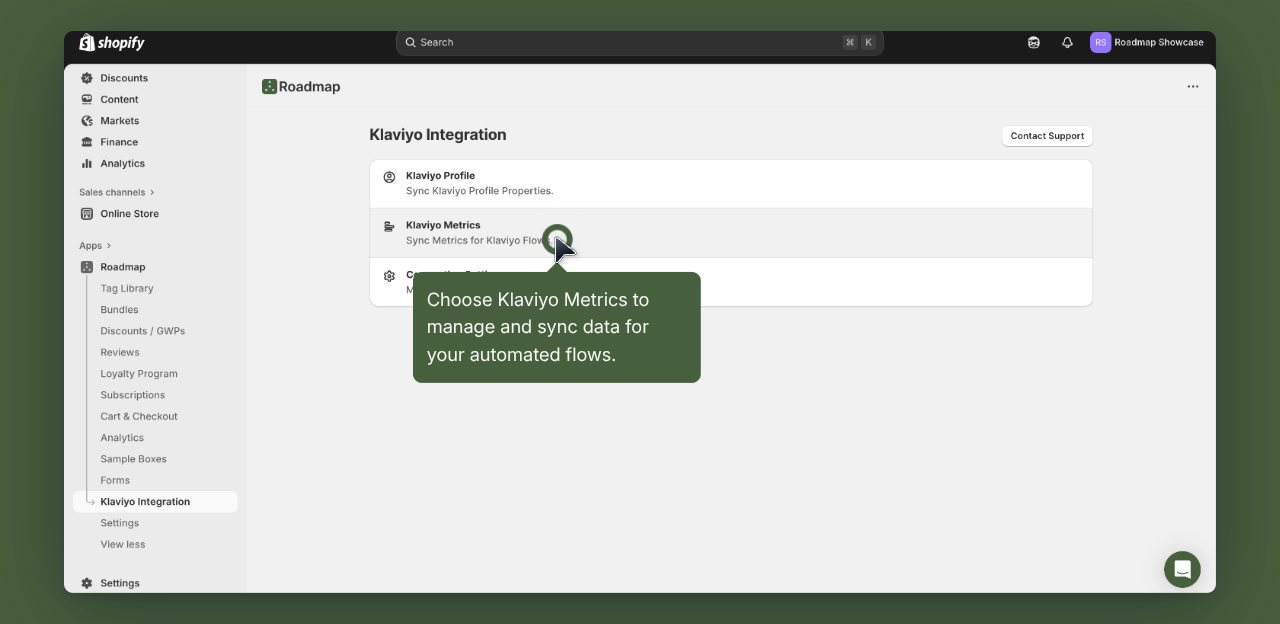
Select Klaviyo Metrics to sync Roadmap metrics used by Klaviyo Flows. This is where you manage which Roadmap data points appear as usable flow triggers/filters in Klaviyo.
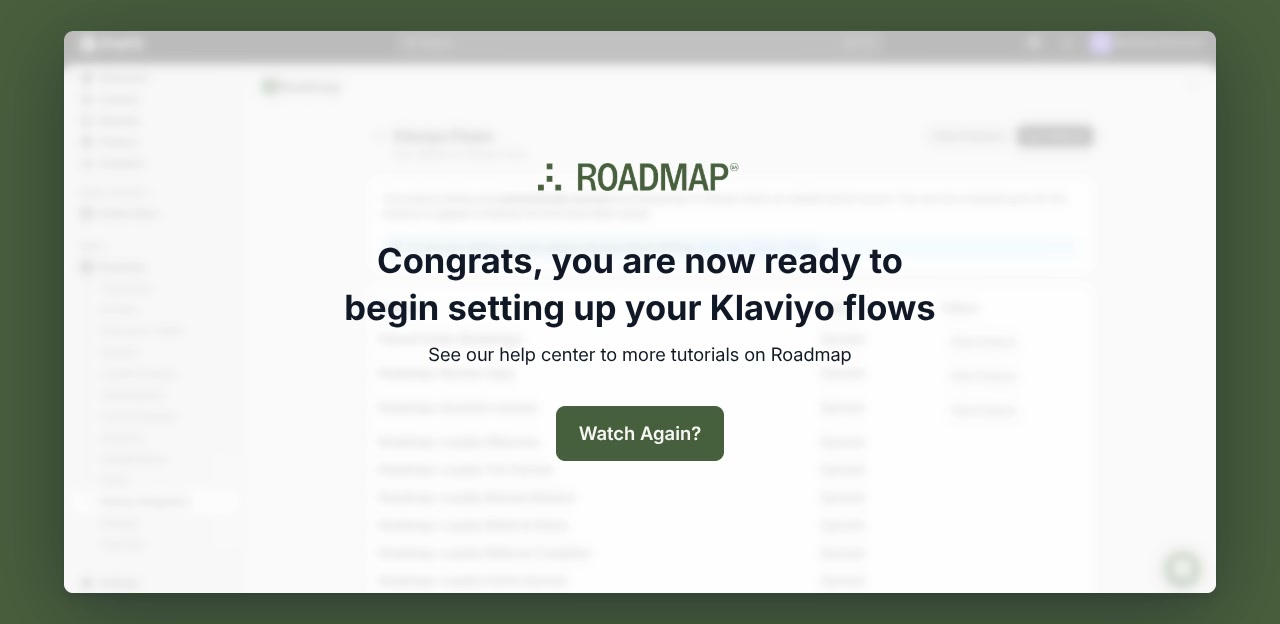
Step 5: Confirm your flows are ready
When you’ve finished syncing, you’ll see a confirmation screen indicating you’re ready to begin setting up your Klaviyo flows.