

Getting started with tag Library
What Tag Library does
Tag Library lets you add store logic that would normally require custom code, manual tagging across products/pages/customers, and extra theme conditions. Instead, you create a tag in the app and choose a tag type (like Secret Product or Protected Pages). The tag then enforces access rules automatically using:
- Customer eligibility rules (for example, only logged in customers tagged with a specific customer tag)
- Schedules (start/end dates and what happens when the tag is inactive)
- Optional password protection (for pages)
Where to start: the Tag Library home
When you open the app you’ll land on the Tag Library screen. From here you can create tags, review existing tags, and check whether each tag is Draft or Active.
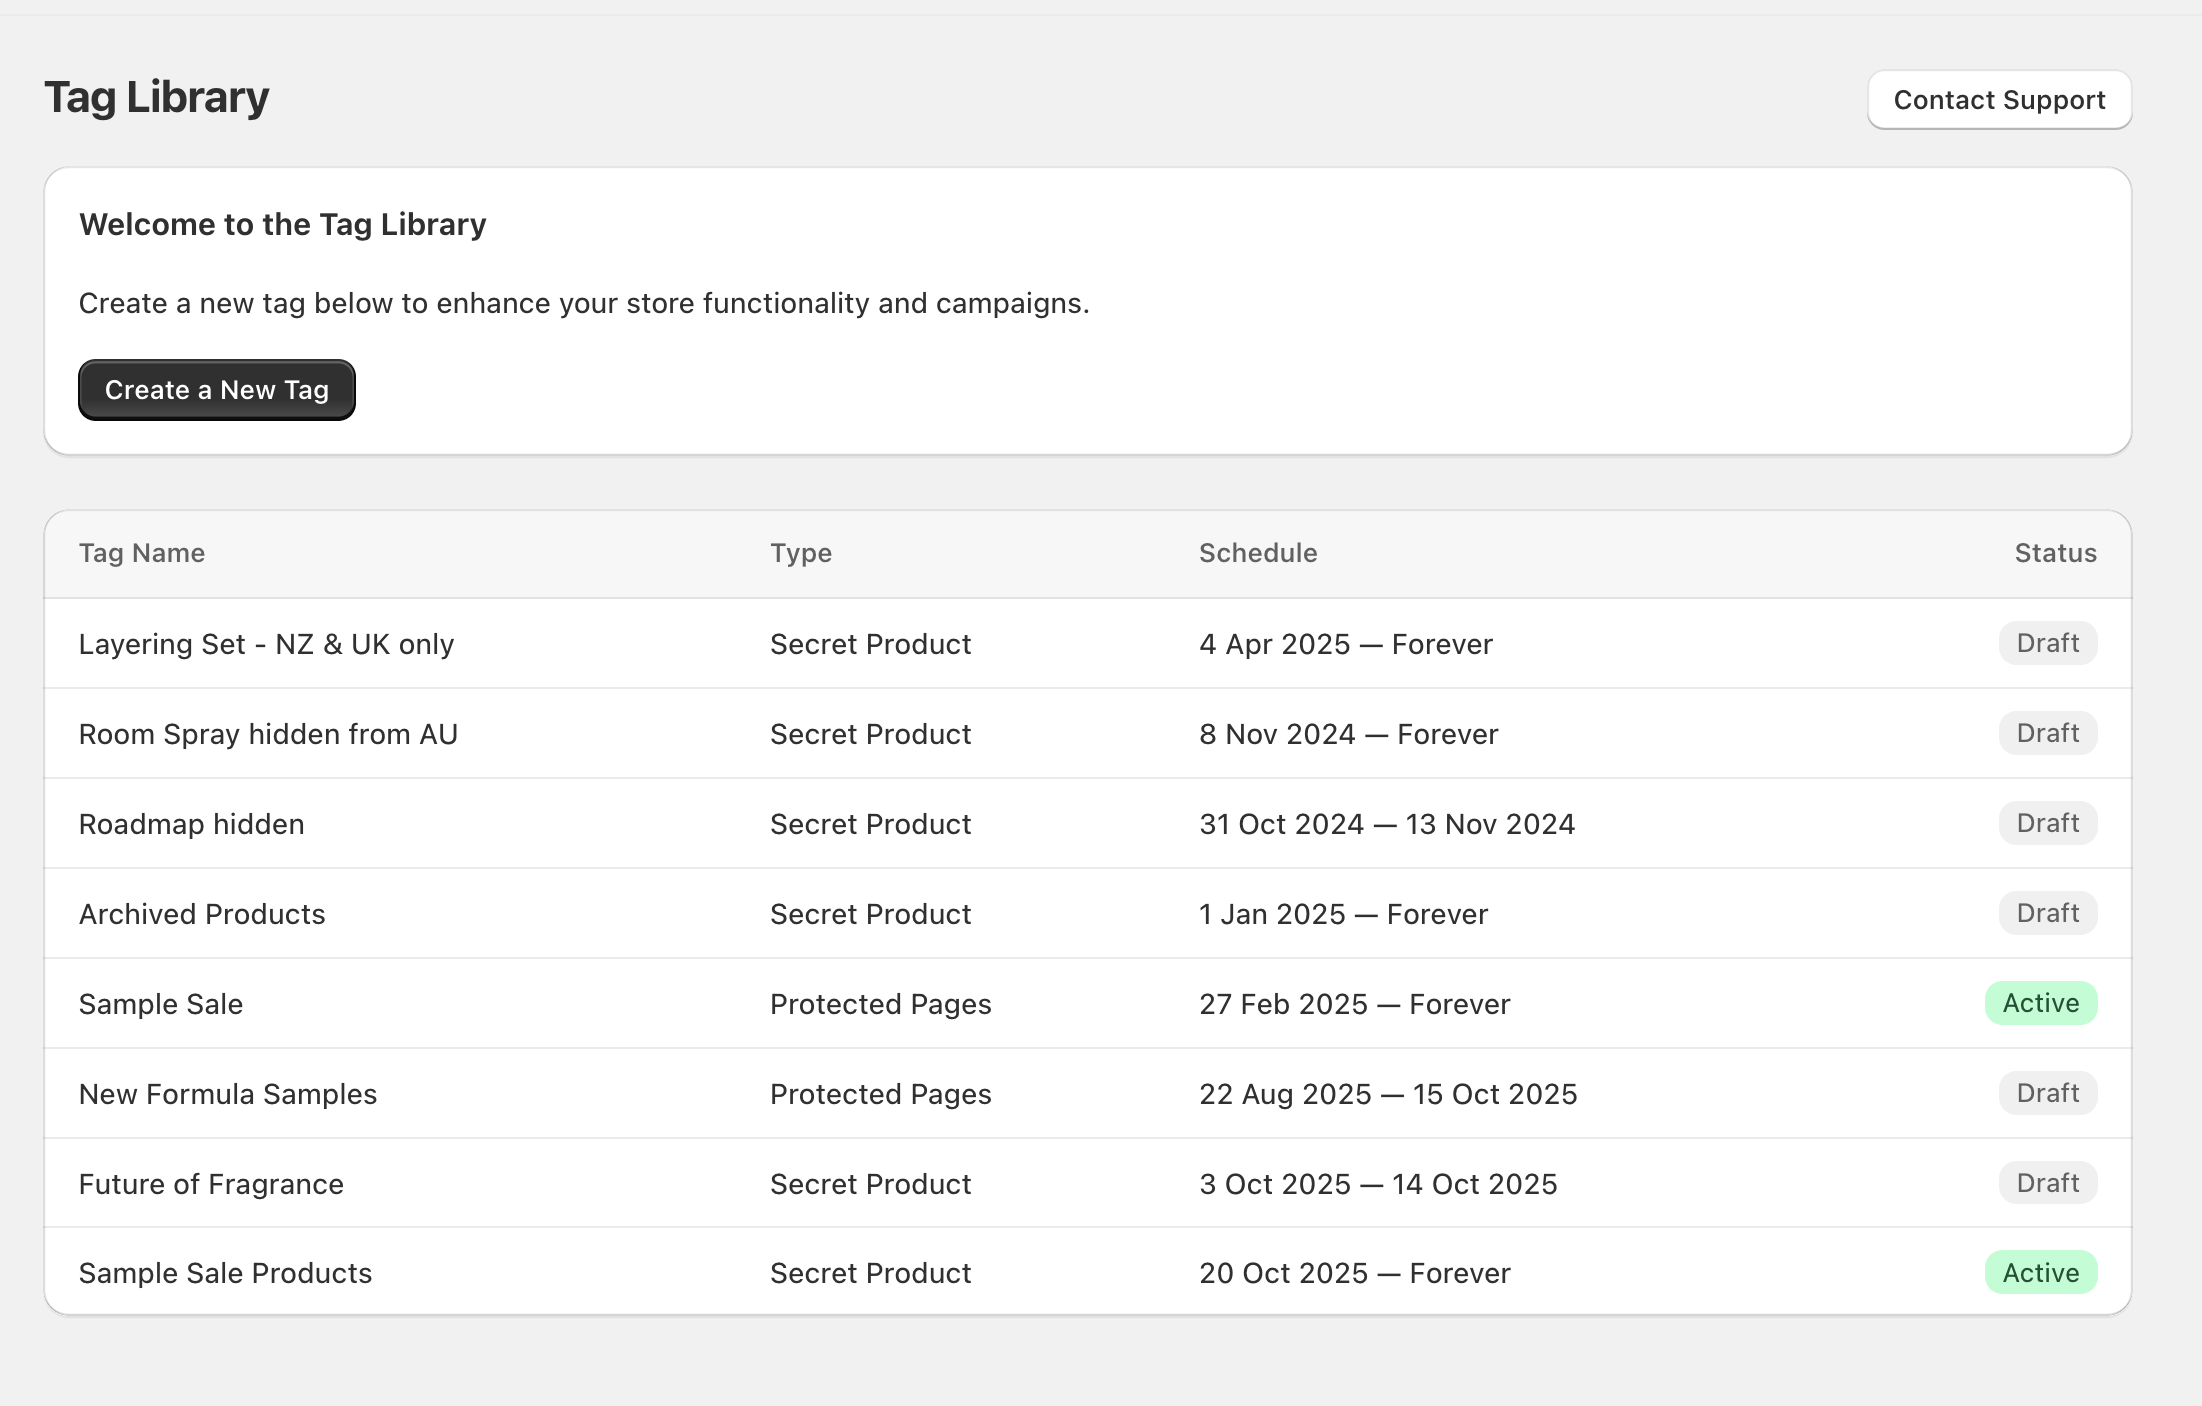
Key UI you’ll use
- Create a New Tag button to create a tag
- Tag list columns: Tag Name, Type, Schedule, Status
- Contact Support (top right) if you need help
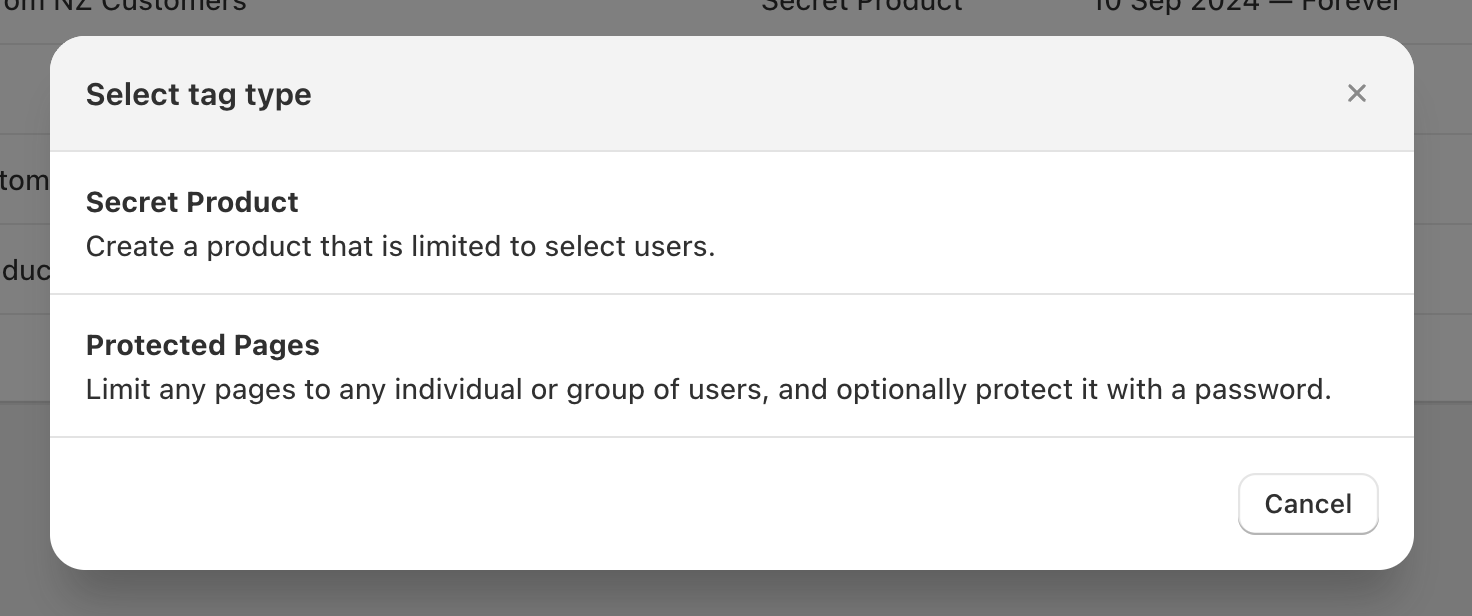
Create your first tag
- Secret Product — create a product experience limited to select users.
- Protected Pages — limit specific URLs to select users and optionally protect them with a password.
Secret Product tags
Use a Secret Product tag when you want certain products or collections to be visible only to specific customers (for example, wholesale customers tagged Trade).
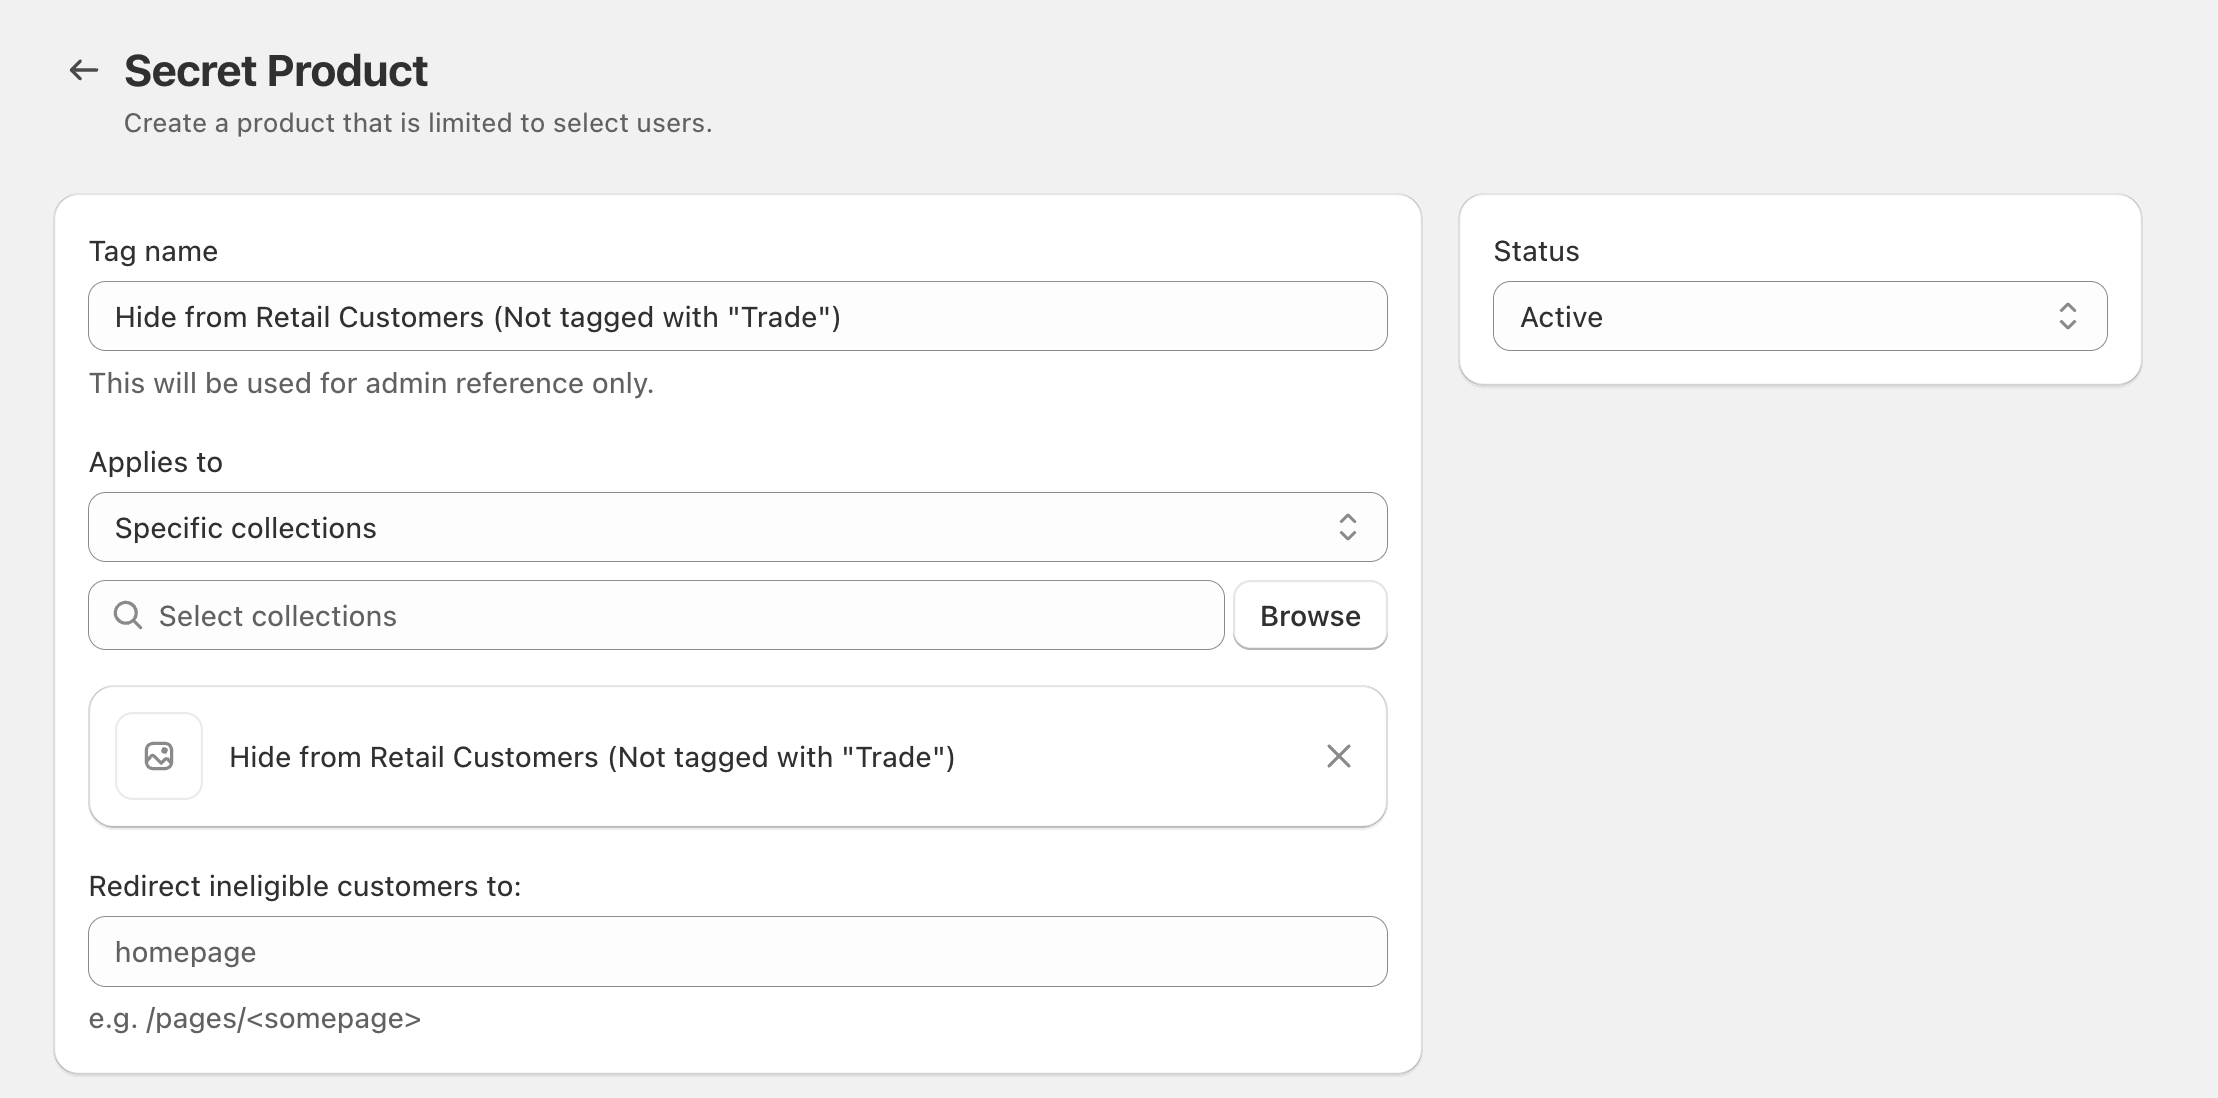
Configure a Secret Product tag
homepage).
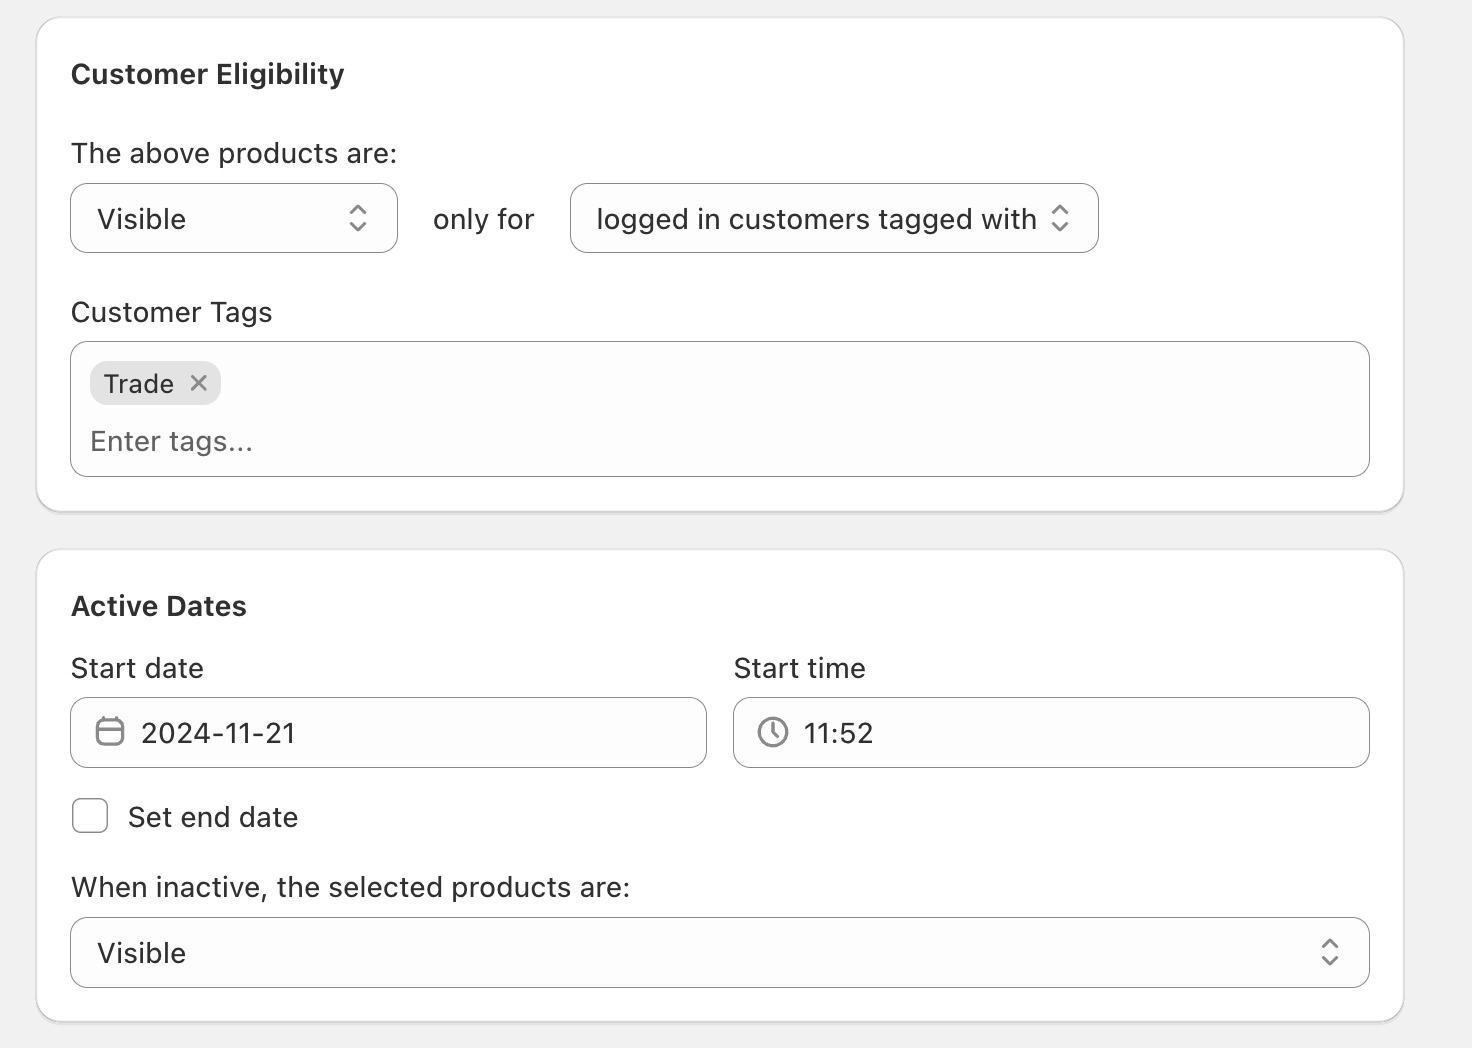
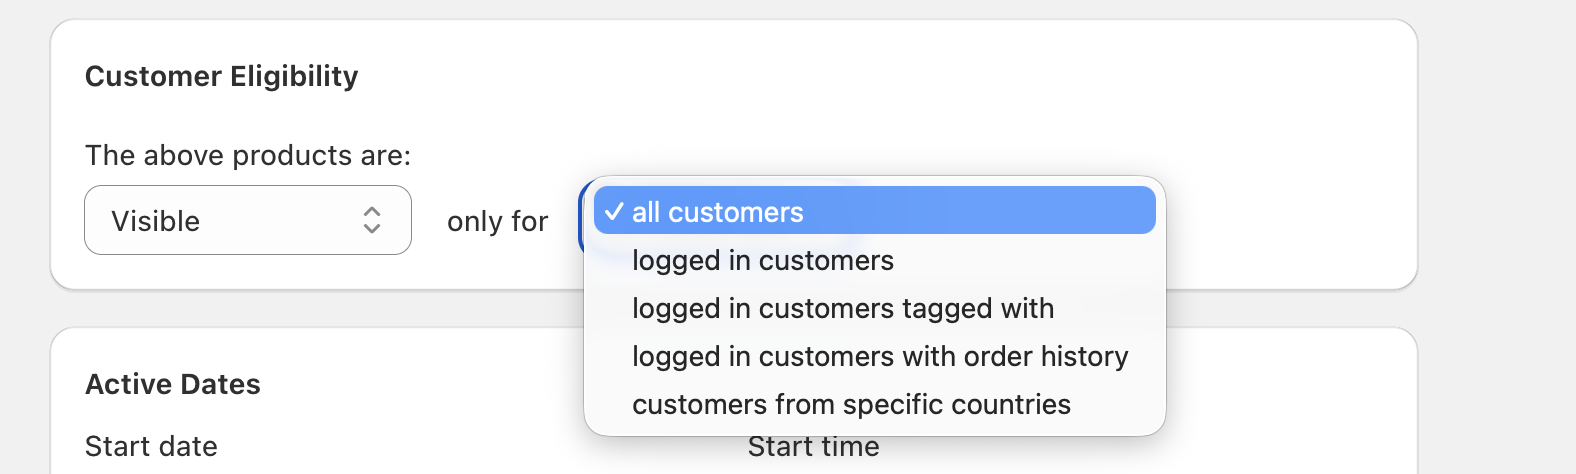
- The above products are: Visible
- only for logged in customers tagged with
- Add one or more values in Customer Tags (for example,
Trade)
You can also choose what happens when the tag is inactive using When inactive, the selected products are:.
Wholesale access - Trade so it’s obvious what customer tag is required.Customer eligibility options you may see
The only for dropdown can include options like:
- all customers
- logged in customers
- logged in customers tagged with
- logged in customers with order history
- customers from specific countries
Protected Pages tags
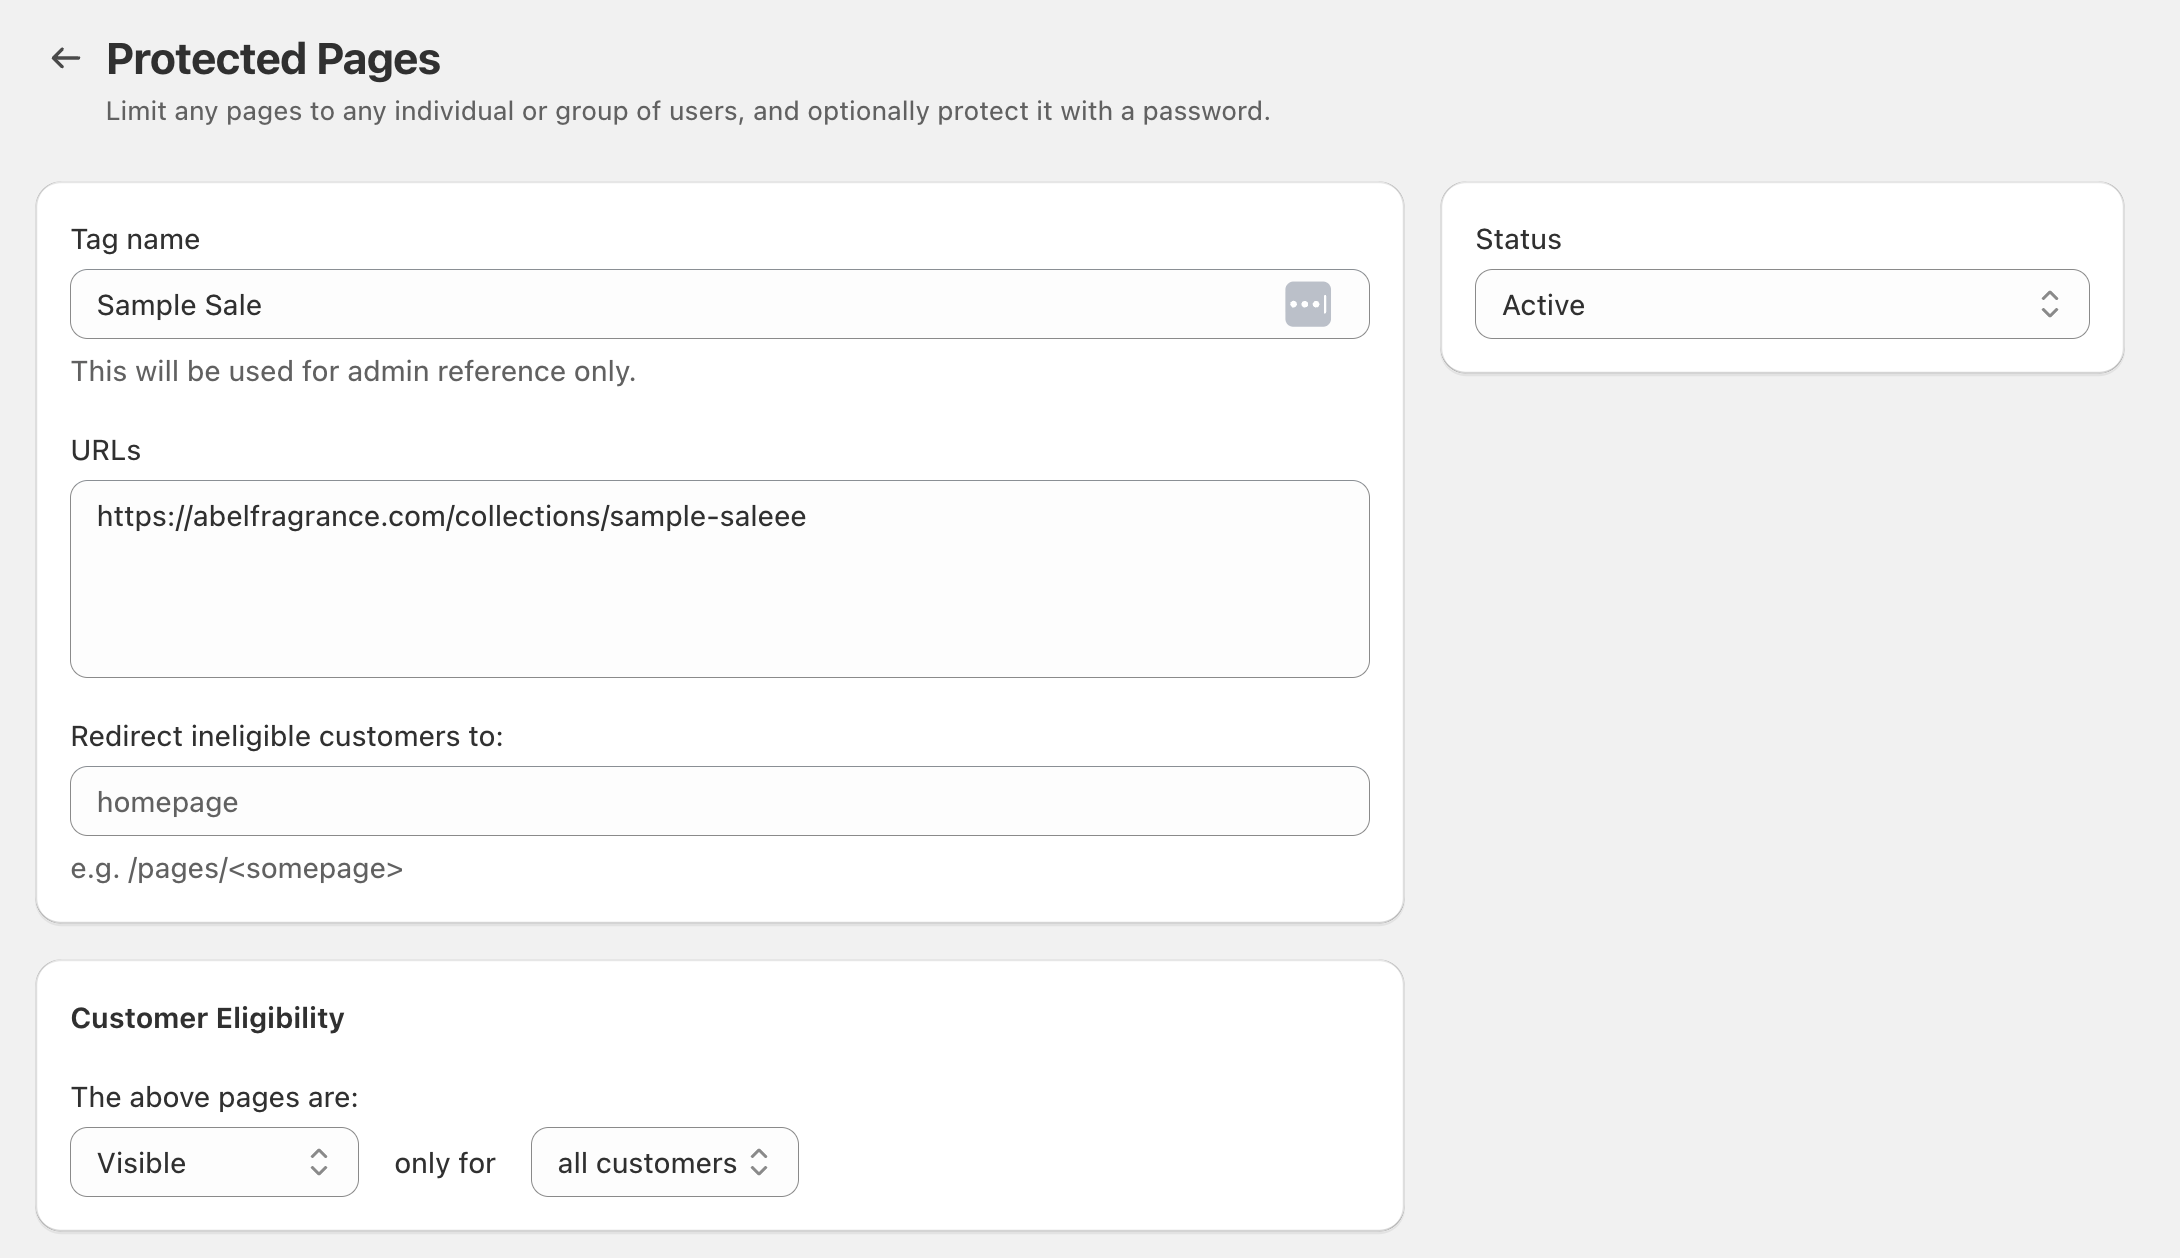
Use Protected Pages when you want to restrict access to specific storefront URLs (like a hidden collection link, landing page, or campaign page). You can restrict by customer eligibility and optionally add a password lock screen.
Configure a Protected Pages tag
Use Redirect ineligible customers to: to send blocked visitors to a destination like homepage or another path (the UI shows an example format like /pages/<somepage>).
Then customize the lock screen using:
- Lock Screen Title
- Lock Screen Caption
- Lock Screen Password
- Lock Screen Background Color
- Lock Screen Background Image
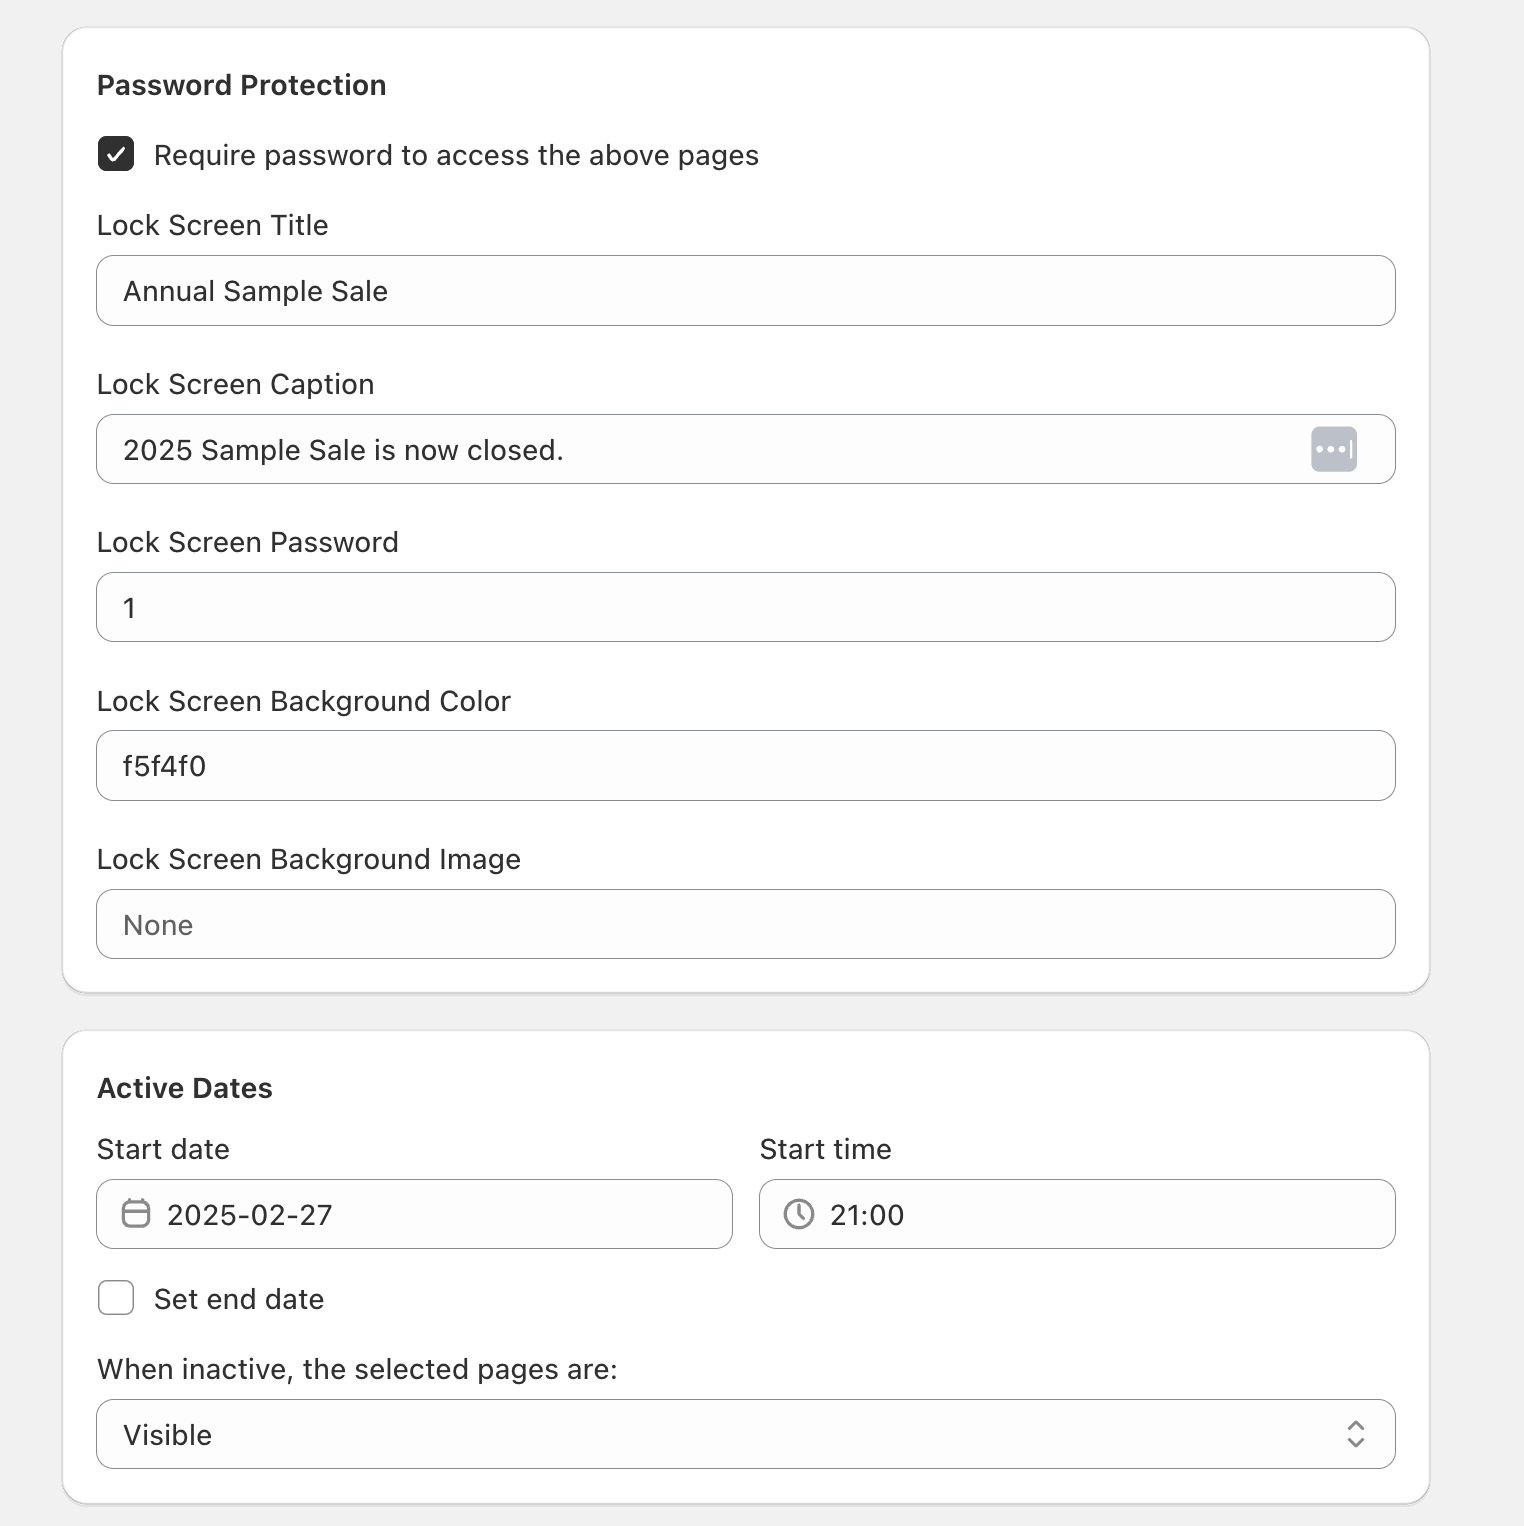
Choose what happens when inactive using When inactive, the selected pages are:.
Manage tags after launch
Back on the Tag Library screen, use the list to audit what’s running and what’s still being prepared:
- Status shows whether a tag is Draft or Active.
- Schedule shows the active window (for example, a start date through an end date, or Forever).
- Type helps you quickly spot whether a tag is for Secret Product or Protected Pages.
How this replaces custom code and theme logic
Without Tag Library, stores often need multiple moving parts to achieve the same outcome—like manually adding product tags, updating customer tags, and adding conditional logic in the theme to hide products or block pages.
With Tag Library, you configure the rules once in the app (eligibility + redirect + schedule + password protection where needed). The tag then enforces those rules consistently, reducing the need for custom theme edits and one-off workarounds.
Create a Secret Product tag that applies to Specific collections. In Customer Eligibility, set products to Visible only for logged in customers tagged with, then add Trade in Customer Tags. Set Redirect ineligible customers to: homepage.
Create a Protected Pages tag and add the sale URL under URLs. Use Active Dates to set your start time (and end date if needed). Optionally enable Password Protection to show a lock screen outside the sale window.