> For the complete documentation index, see [llms.txt](https://docs.roadmap.so/llms.txt). Markdown versions of documentation pages are available by appending `.md` to page URLs; this page is available as [Markdown](https://docs.roadmap.so/loyalty-and-rewards/membership-tiers-and-referrals/loyalty-tiers.md).
# Loyalty Tiers
Create membership tiers — names, levels, customer tags, and the milestone that earns each tier — and choose between points-earned, amount-spent, item-purchased, and tag-based progression.
#### What loyalty tiers are
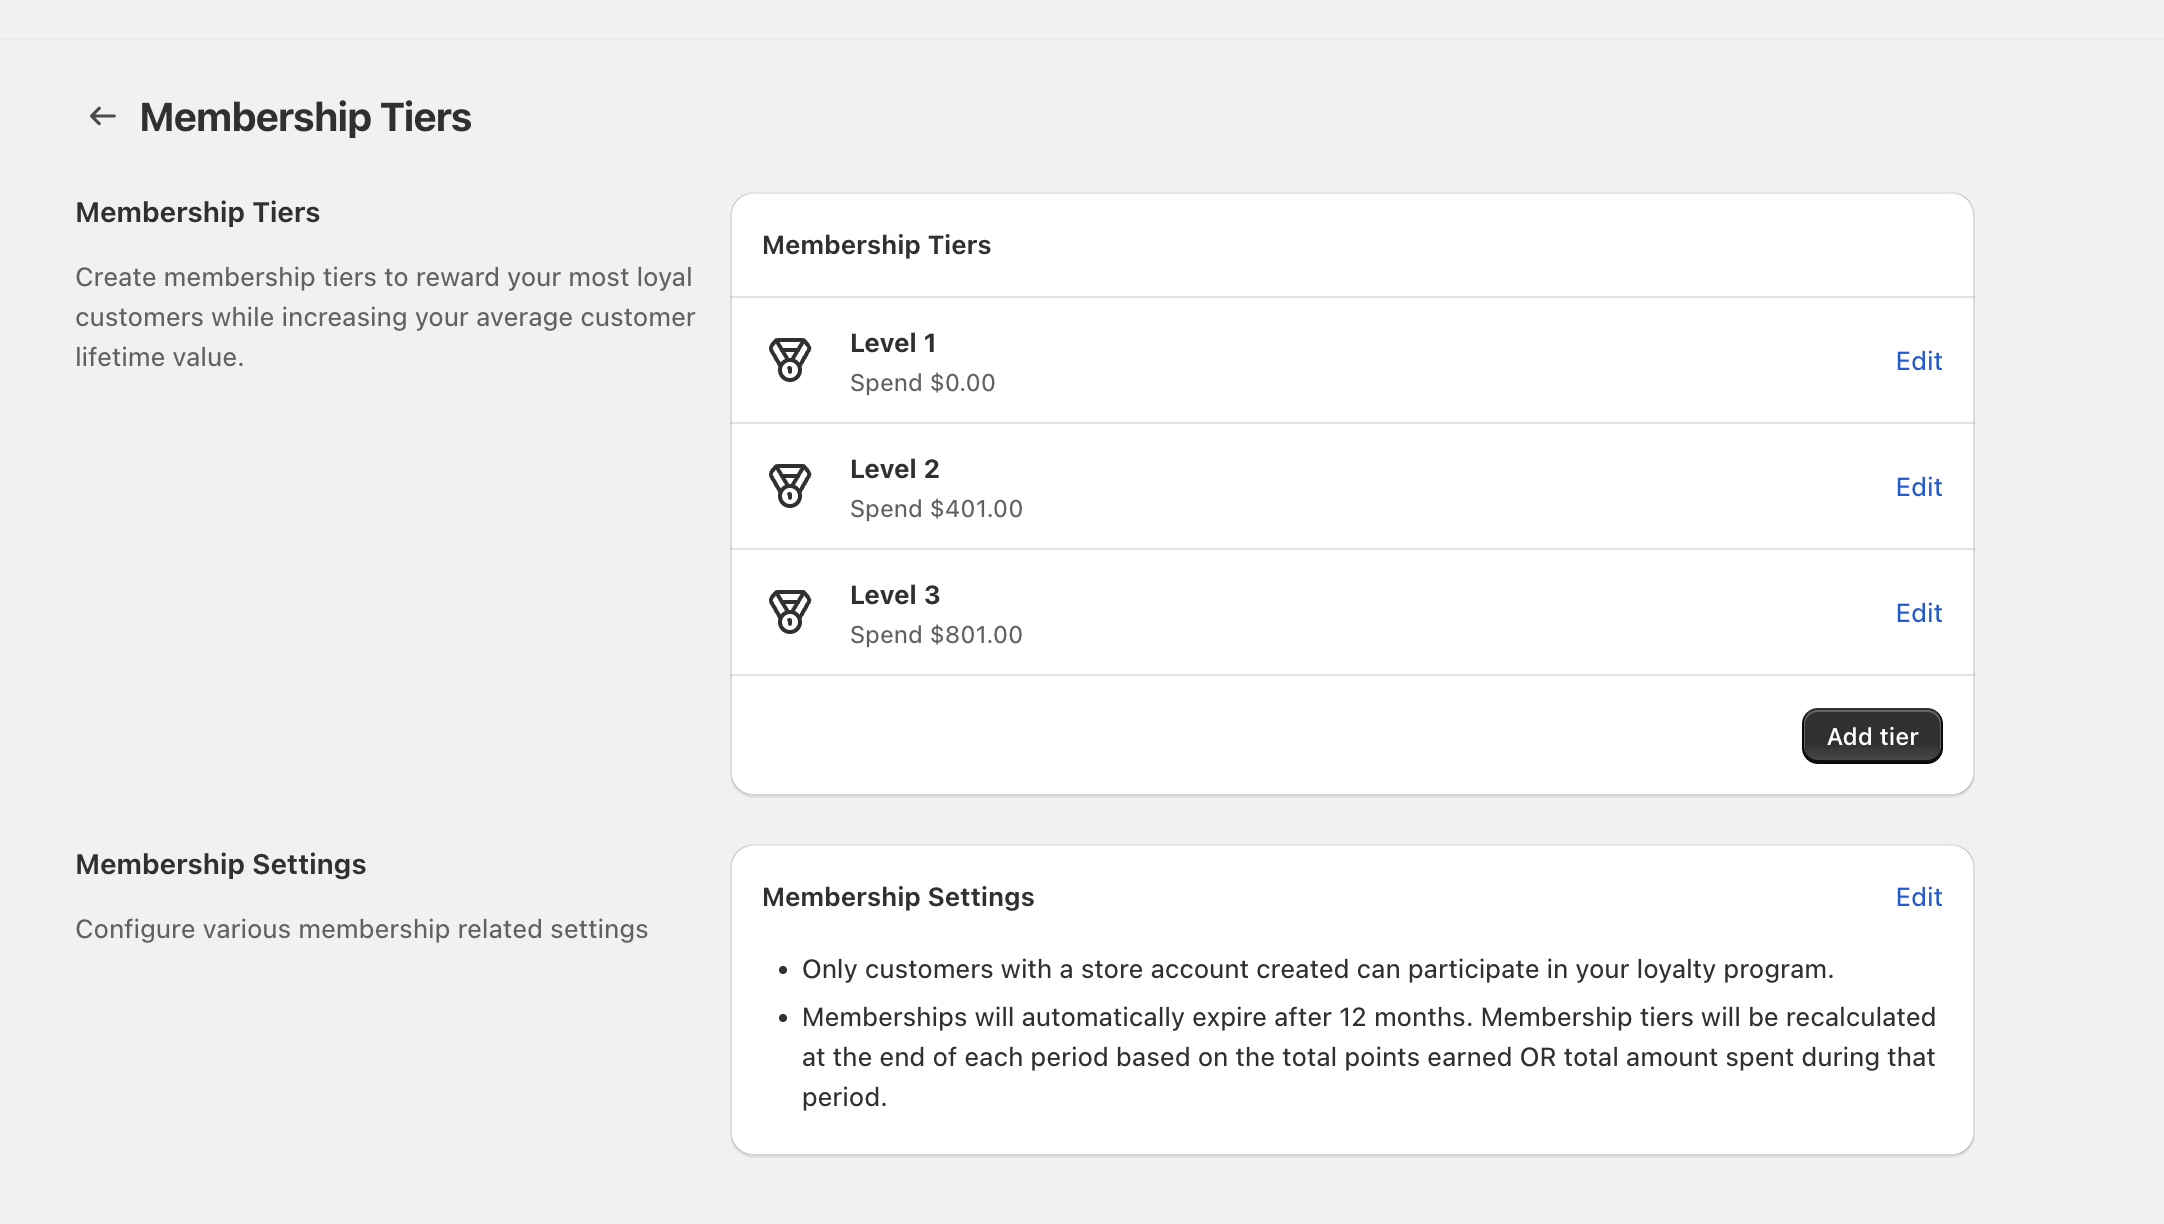
Create a visible membership ladder for loyal customers. Set tiers in **Loyalty Program → Membership Tiers**.
Each tier has a milestone. Customers progress as they qualify.
The Membership Tiers page — your tier ladder, with Membership Settings below it.
#### Create a tier
Click **Add tier**, then configure **Tier name**, **Tier level**, **Customer Tag Name**, and **Milestone to achieve tier**.
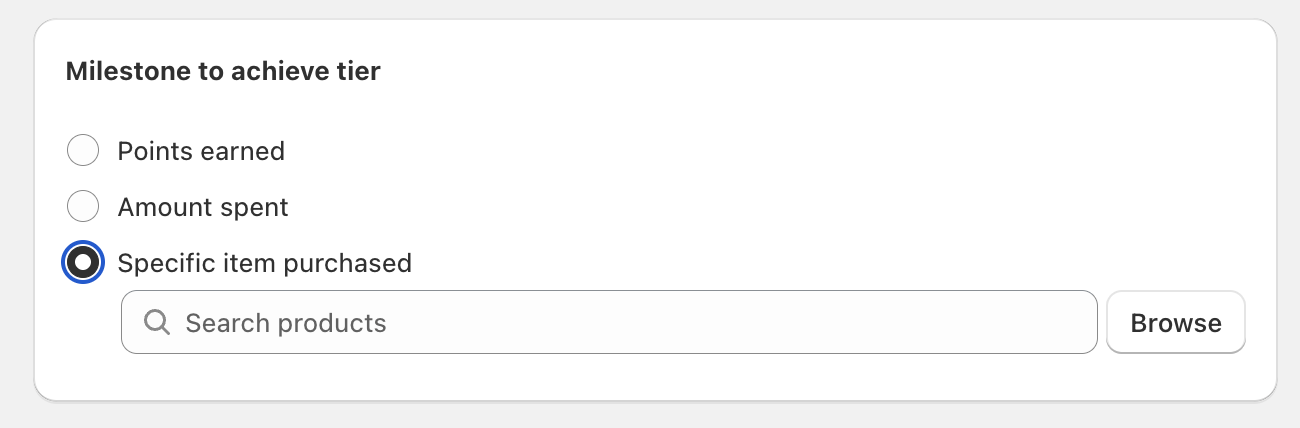
* **Points earned**: Customers qualify when they reach the points threshold you set.
* **Amount spent**: Customers qualify when they reach the spend threshold you set (shown in your store currency, for example `AUD`).
* **Specific item purchased**: Customers qualify when they purchase a specific product you select (via **Search products** or **Browse**).
* **Secondary loyalty program**: Membership is granted by a Shopify customer tag instead of points or spend.
**Tier name** is visible to customers. **Tier level** sets display order. Lower levels display first.
**Customer Tag Name** applies a Shopify customer tag when a customer enters the tier. Use the tag in segments, Klaviyo, Flow automations, and theme logic.
A tier is a name, a level, a tag, and a milestone.
#### Choose a milestone
Use one milestone type across your tier ladder where possible. This keeps progression easy to understand.
**Amount spent** maps tier status directly to revenue. Other earning rules cannot accelerate progression.
**Points earned** rewards engagement across orders, reviews, birthdays, sign-ups, and tags. Plan thresholds around bonus-point promotions.
**Specific item purchased** supports a purchased membership. Pair it with a fixed-duration membership and communicate renewal terms clearly.
**Secondary loyalty program** sits outside the ladder: it's a tag-granted tier for paid memberships, VIPs, and staff, and customers keep it for as long as the trigger tag is assigned. Full guide: [Tag-based membership tiers](/loyalty-and-rewards/membership-tiers-and-referrals/tag-based-membership-tiers.md).
#### What determines the order of tiers
Tier order is controlled by **Tier level** on the **Edit Membership Tier** screen. Lower tiers are displayed first.
If you want a classic tier ladder, set **Tier level** to 1 for Bronze, 2 for Silver, and 3 for Gold.
#### Members without a tier
Customers can belong to the program without holding a tier. If the first tier starts at `200` points, lower-balance members show **None** in **Manage Customers**.
An entry threshold preserves tier status and gives new members a clear goal.
#### Tier-specific cart messages
The **Edit Membership Tier** form includes a **Cart announcement bar** card. Give a tier its own **Message** and its members see it in the cart bar instead of the default. Snippet chips personalise it: `{amount}`, `{total_points}`, `{cart_points}`, `{current_tier_name}`, `{next_tier_name}`, `{points_required}`, `{amount_required}`. Snippets with no value are removed from the message, so keep next-tier wording out of your top tier's message. The bar itself is configured in [Cart Announcement Bar settings](https://docs.roadmap.so/cart-and-checkout/cart-announcement-bar).
#### Progression and membership duration
See [Tier progression rules](/loyalty-and-rewards/membership-tiers-and-referrals/tier-progression-rules.md) for tier-change mechanics. See [Loyalty membership eligibility settings](/loyalty-and-rewards/getting-started/loyalty-membership-eligibility-settings.md) for participation and membership duration.
#### Edit tiers
{% stepper %}
{% step %}
#### Open Membership Tiers
Go to **Membership Tiers** and find the tier you want to change in the list.
{% endstep %}
{% step %}
#### Click Edit
Select **Edit** on the tier row (for example, next to `Level 1`).
{% endstep %}
{% step %}
#### Update display details
In **Display**, edit **Tier name** (for example, Bronze/Silver/Gold), confirm **Tier level**, and set a **Customer Tag Name** to apply when a customer enters that tier.
{% endstep %}
{% step %}
#### Choose how the tier is earned
Under **Milestone to achieve tier**, select **Points earned**, **Amount spent**, **Specific item purchased**, or **Secondary loyalty program**, then enter the threshold, pick the product, or set the trigger tag.
{% endstep %}
{% step %}
#### Save changes
Click **Save**.
{% endstep %}
{% endstepper %}
#### Add or delete tiers
* To add a new tier, select **Add tier** on the **Membership Tiers** page.
* To delete a tier, open it with **Edit** and select **Delete** on the **Edit Membership Tier** screen.
**Deleting a tier removes that tier configuration.** If you’re using **Customer Tag Name** in other tools, review any workflows or segments that rely on that tag before deleting.
#### Frequently asked questions
Can I use different milestones across tiers?
Yes. Each tier has its own milestone. Use one scale where possible so customers understand progression.
What’s the difference between Tier name and Customer Tag Name?
**Tier name** is what customers see (for example, Bronze). **Customer Tag Name** is the tag applied when their membership tier changes, which is useful for targeting or filtering customers by tier.
Where do I set eligibility and membership duration?
Use [Loyalty membership eligibility settings](/loyalty-and-rewards/getting-started/loyalty-membership-eligibility-settings.md).
#### Related guides
* [Tag-based membership tiers](/loyalty-and-rewards/membership-tiers-and-referrals/tag-based-membership-tiers.md)
* [Tier progression rules](/loyalty-and-rewards/membership-tiers-and-referrals/tier-progression-rules.md)
* [Loyalty membership eligibility settings](/loyalty-and-rewards/getting-started/loyalty-membership-eligibility-settings.md)
* [Reward customers for reaching a tier](/loyalty-and-rewards/membership-tiers-and-referrals/reward-customers-for-reaching-a-tier.md)
* [Send discount codes for birthdays and tier promotions](/loyalty-and-rewards/membership-tiers-and-referrals/send-discount-codes-for-birthdays-and-tier-promotions.md)
* [B2B membership tiers](/loyalty-and-rewards/b2b-loyalty/b2b-membership-tiers.md)
---
# Agent Instructions
This documentation is published with GitBook. GitBook is the documentation platform designed so that both humans and AI agents can read, navigate, and reason over technical content effectively. Learn more at gitbook.com.
## Querying This Documentation
If you need additional information that is not directly available in this page, you can query the documentation dynamically by asking a question.
Perform an HTTP GET request on the current page URL with the `ask` query parameter, and the optional `goal` query parameter:
```
GET https://docs.roadmap.so/loyalty-and-rewards/membership-tiers-and-referrals/loyalty-tiers.md?ask=&goal=
```
`ask` is the immediate question: it should be specific, self-contained, and written in natural language.
`goal` is optional and describes the broader end goal you are ultimately trying to accomplish on behalf of the user. GitBook uses it to tailor the answer towards what is most useful for that goal.
The response will contain a direct answer to the question and relevant excerpts and sources from the documentation.
Use this mechanism when the answer is not explicitly present in the current page, you need clarification or additional context, or you want to retrieve related documentation sections.